I'm addicted.
I need some therapy, perhaps?
Someone stop me.
It is just SO fun. They are so cute. And I hate to waste fabric scraps.
Would you believe 2 months ago I did not know what the term "applique" meant? Honestly, both the word and concept intimidated me. I think it intimidates a lot of people. I am still learning how to pronounce it.
My relationship with appliqueing was somewhat unexpected. You might call it accidental. I did not set out and say "I'm learning to applique today." Rather, I found myself doing it when I was working on the birthday banner. Appliqueing was the method I used to put the letters on the background fabric. About half way through the process of making the b-day banner, a light went off. By George, this is applique!!!
If you are still overwhelmed by the term and even more overwhelmed at the thought of learning to applique, rest assured. There is no need to be afraid. It is simple. Quite simple. Take it from a seamstress who has never had a class. Really I don't even deserve the title of seamstress. I'm just a lady that owns a sewing machine.
Maybe a closer look at the definition of applique would be helpful.
Wikipedia's definition...
Applique
In the context of sewing, applique refers a needlework technique in which pieces of fabric, embroidery, or other materials are sewn onto another piece of fabric to create designs, patterns or pictures. It is particularly suitable for work which is to be seen from a distance, such as in banner-making.
Now that we got all that out of the way, here's a little step by step "how to" for appliqueing onesies.
1) Collect your fabric scraps.
 2) Cut out a square, circle, any shape you like out of your fabric of choice.
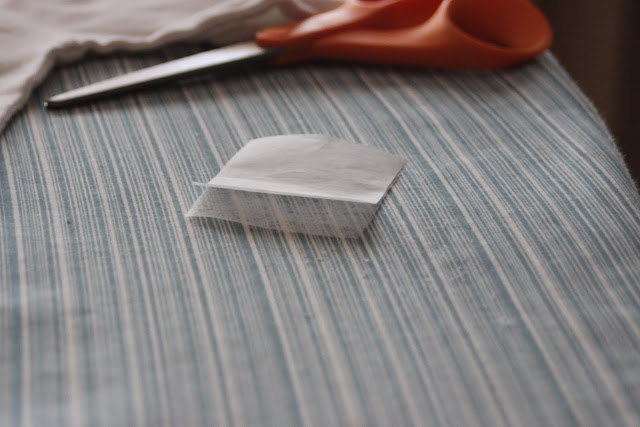
 3) Take iron on applique paper. This here is called Wonder Under. You can find it or a similar product at any fabric store.
 4) Trace your shape onto the PAPER side.
 5) Cut out your shape and peel off PAPER leaving a the translucent thin sheet. This is the part that you actually use to iron the fabric onto the onesie.
 6) Iron on fabric to onesie. It takes about 10 seconds.
 *The point of using this iron on paper is to adhere the two fabrics together so that it is much easier to stitch. It also gives it a smoother more polished look.
 7) Stitch the edges.
 And you're done!!!
 I have also been using square patches of fabric with small prints. Here is one of my favorites...
 Happy Crafting!


8 comments:
so freaking cute. who knew you had a darby living inside you? actually, you've always had a flare for the craft. I wish I would have thought to commission you to make J a b-day onesie!
Adorable! My mom just gave me a little Singer sewing machine for Valentine's Day (Yes, she still gives us stuff). I can't wait till I have time to try it out! I need you to teach me!!
Yay!! So excited about this...
I'm totally amazed at you!!
You're awesome. Also, Stephen Small is going to be wearing onesies until he's in high school :) Adorable!
Even you iron is crafty looking! You are something else...
SS is going to look like a handsome little devil in all your creations. However, I am in no way talented or crafty. If you accidentally come across some 24M onesies and an extra scrap-o-something-cute, hit me up girl.
Those are adorable. You don't even need an embroidery machine for such cuteness.
Post a Comment